There are situations where you don’t want to maintain an infrastructure to run huge no. of tests, and willing to opt some cloud solutions like browserstack.
Browserstack is an online infrastructure on cloud, that provides some options for any automation testing framework to run the tests on their platform.
This reduces the headache of maintaining the infrastructure like CICD pipeline and QAs can focus on writing the test script, test coverage or maintaining framework etc.
If you want to give a try on browserstack, go ahead and singup using your email address which will give you 100min of trial period to run your tests on their platform.
There are different varieties of licensing to test the platforms, like
- Live – For manual testing on web applications
- App live – For manual testing on mobile applications
- Automate (includes live) – to run automation testing on web application
- App live – For running automation tests on mobile apps
For each of above category, you will get 100min of trial period which is enough to get hands on experience.
For this post, we will use Automate
Navigate to Browserstack > Select Product > Select Automate
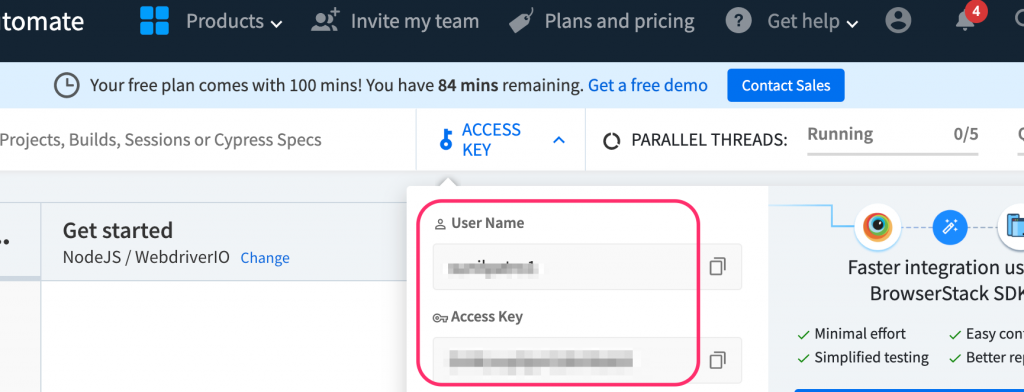
Click on the ACCESS KEY drop down, and keep the note of username and access key, which will help to authenticate which account the tests should redirect to.

Under Get started section, click on change to chose any framework and language combination to get the basic documentation on how to configure your framework to redirect the test run on browserstack.
and you will see all the details on the configurations to change in your framework to redirect the test run to browserstack.
Browserstack provides an example of config file as test.config.ts and is found here.
You can change accordingly and fit in your framework.
For example – refer WebdriverIO_Typescript github project
I have added below config file wdio.conf.bstack.ts which is a customisation / addition of new configuration options on top of the base config file.
import {config} from './wdio.conf'
require('dotenv').config()
var _=require("lodash")

var overrides = {
    user: process.env.BROWSERSTACK_USERNAME,
    key: process.env.BROWSERSTACK_ACCESS_KEY,

    specs: [
        './test/pom/specs/**/*.ts'
        //'./test/samples/**/*.ts'
        //'./test/elements/accessibilitySelector.ts',
    ],

    capabilities: [
        {
          browserName: 'Safari',
          browserVersion: '15.6',
          'bstack:options': {
            os: 'OS X',
            osVersion: 'Monterey'
          }
        },

        {
          browserName: 'Firefox',
          browserVersion: '102.0',
          'bstack:options': {
            os: 'Windows',
            osVersion: '10'
          }
        }],
    commonCapabilities: {
            'bstack:options': {
              buildName: 'browserstack-build-1'
            }
          },
          maxInstances:2,

          services:[['browserstack', {
            browserstackLocal: true
        }]]
}

exports.config = _.defaultsDeep(overrides, config)
As you see above we haven’t included the USERNAME and ACCESSKEY directly rather we are using user:process.env.BROWSERSTACK_USERNAME & key:process.env.BROWSERSTACK_ACCESS_KEY
This user and key value can come from .env file (stored locally) or as command line argument (just to avoid hard code of the values)
specs section define what tests to run on browserstack.
Multiple capabilities can be added & run as parallel based on the maxInstances value added.
Othes config options are just overridden from base config file.
Run the tests –
To run the test on the browserstack, open command prompt / terminal and type the below command
npm run wdio:bstack
This above command comes from package.json
Refresh the browserstack page and scroll down to see the tests running and you can see the live running of tests.
You will also view all the capability details and exception as well if tests fail.
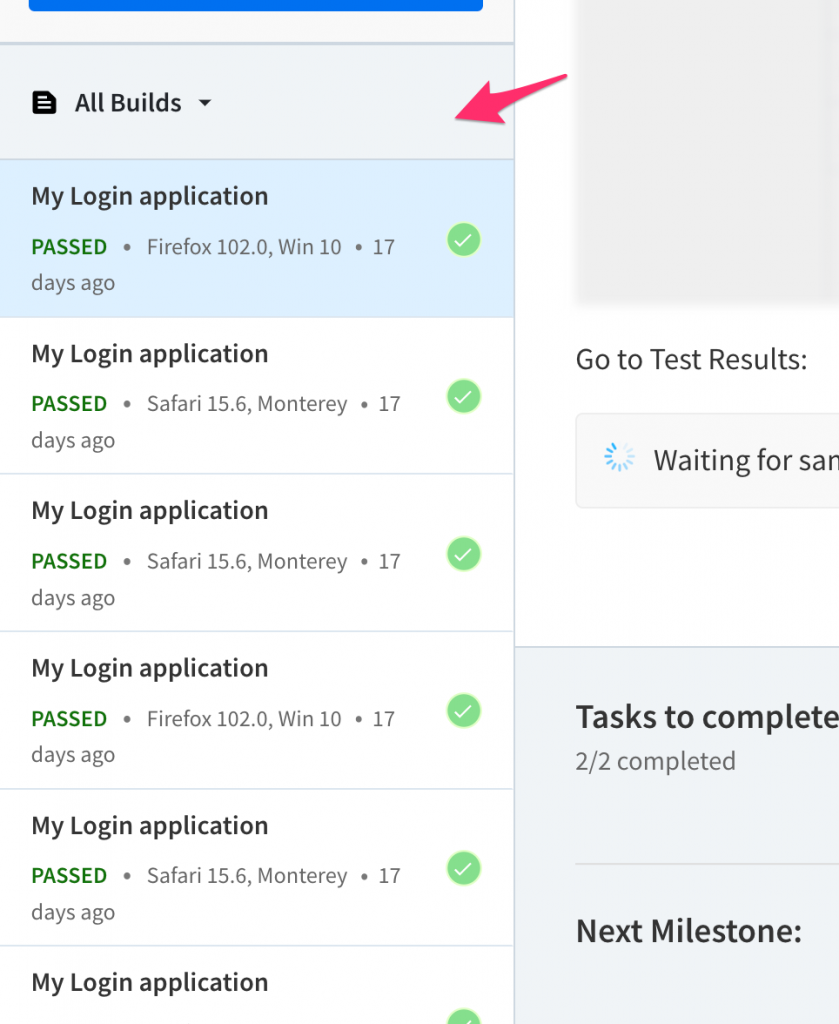
All the builds / tests run can be in one place on the left side of panel for future reference.


