 As we have seen on our prev post Sikuli intro, how to download and automate desktop application, in this post we will be looking to integrating Sikuli with selenium WebDriver for web automation.
From the prev post, as you downloaded sikuli
- Double click on sikulixsetup-x.x.x.jar
- Click on Pack2 to download sikulixapi.jar
- Include sikulixapi.jar in eclipse IDE
If using Maven build with eclipse, then include following dependency in pom.xml
<!-- https://mvnrepository.com/artifact/org.sikuli/sikuli-api -->
<dependency>
    <groupId>org.sikuli</groupId>
    <artifactId>sikuli-api</artifactId>
    <version>1.2.0</version>
</dependency>
now we are all set to implement sikuli automation with selenium in eclipse IDE
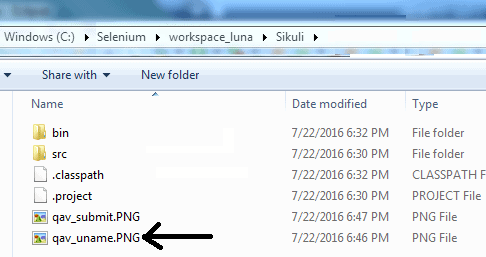
Capture the portion of browser webelement and place it under project folder
 qav_uname.png

package tst;

import java.util.concurrent.TimeUnit;

import org.openqa.selenium.WebDriver;
import org.openqa.selenium.firefox.FirefoxDriver;
import org.sikuli.script.FindFailed;
import org.sikuli.script.Screen;

public class TestSikuli {

	public static void main(String[] args) throws FindFailed {
		WebDriver driver = new FirefoxDriver();
		driver.get("http://qavalidation.com/demo");
		driver.manage().window().maximize();
		driver.manage().timeouts().implicitlyWait(2000, TimeUnit.SECONDS);

		Screen s = new Screen();
		s.doubleClick("qav_uname.PNG");
		s.type("QAValidation");
		//This line will not execute as this is not visible on screen,
		//you need to scroll to make the object visible
		//s.doubleClick("qav_submit.png");
	}
}
For more sikuli methods, refer Method Summary section under http://doc.sikuli.org/javadoc/


